

To install component speakers, first, disconnect the negative battery terminal. Next, remove the door panels and factory speakers before connecting the new component speakers to the existing wiring harness.
Then, attach the speaker’s woofer and tweeter in the designated locations, making sure they are securely fastened. Finally, reassemble the door panels and reconnect the battery terminal.
Tools And Materials You’ll Need
To install component speakers, you will need a range of tools and materials. These include screwdrivers, wire cutters, electrical tape, and speaker brackets. Ensure you have all the necessary equipment before starting the installation process.
Required Tools For Installation
- Wrench
- Screwdriver set
- Wire cutter/stripper
- Socket set
- Drill and drill bit set
- Wire crimpers
- Tape measure
- Electrical tape
- Soldering iron and solder
Necessary Materials For Installation
- Component speakers
- Speaker wires
- Mounting brackets
- Screws or bolts
- Connector and adapter plugs
- Soundproofing material (optional)
- Electrical connectors
To install component speakers in your vehicle, you will need a variety of tools and materials. The required tools for the installation include a wrench, screwdriver set, wire cutter/stripper, socket set, drill and drill bit set, wire crimpers, tape measure, electrical tape, and a soldering iron with solder. These tools will help you effectively remove the existing speakers and install the new component speakers. Make sure you have the necessary materials as well, including the component speakers themselves, speaker wires, mounting brackets, screws or bolts, connector and adapter plugs, soundproofing material (optional), and electrical connectors. Having all the right tools and materials on hand will ensure a smooth and successful installation process.
Removing The Old Speakers
Removing the old speakers is the first step in installing component speakers. To access the old speakers, you need to remove the door panels. Begin by locating and removing any screws or bolts that are holding the door panel in place. These are typically found near the edges of the panel or inside the door handle. Once the screws or bolts are removed, use a panel removal tool or a flathead screwdriver to gently pry the panel away from the door frame.
Be careful not to use too much force, as this can damage the panel or the clips holding it in place. Once the panel is loose, carefully lift it up and away from the door frame. You may need to disconnect any electrical connections, such as power window switches or door locks, before fully removing the panel.
With the door panel removed, you can now disconnect and remove the old speakers. Start by locating the wires connected to the speakers. These are usually connected with a clip or harness. Carefully disconnect the wires by pressing on the clip or releasing the harness. Once the wires are disconnected, remove any screws or bolts securing the speakers to the door frame. With the screws or bolts removed, you can now take out the old speakers.
Preparing For Installation
Installing component speakers is a great way to enhance the audio quality in your vehicle. Before beginning the installation process, it is important to properly prepare. One of the first steps is to choose the right location for the component speakers. Consider the size and shape of your vehicle and find a location that will allow for optimal sound distribution and fit within the available space.
Once you have chosen the location, it is crucial to ensure proper wiring and connections. Make sure to carefully read the instructions that come with your component speakers and gather all the necessary tools and materials. Identify the positive and negative terminals on the speakers and connect them to the corresponding wires in your vehicle.
As you connect the wires, pay close attention to the polarity to ensure proper sound reproduction. It is also recommended to use solder and heat shrink tubing to secure the connections and prevent any potential issues down the road.
Mounting The Component Speakers
In order to install component speakers in your vehicle, it’s important to properly mount them for optimal sound quality. One of the first steps is to prepare the speaker mounting adapters. These adapters are essential for fitting the component speakers into the existing speaker openings or mounting locations in your car.
When preparing the speaker mounting adapters, make sure they are compatible with the size and shape of your component speakers. Additionally, ensure that the adapters are made from durable materials to provide stability and avoid any vibration or rattling noises.
Once you have the speaker mounting adapters ready, align the component speakers with the mounting holes on the adapters. Ensure that the speakers fit securely and snugly into the adapters. This will help maintain proper alignment and prevent any movement while driving.
Next, it’s important to secure the component speakers to the mounting adapters using screws or other appropriate fasteners. Make sure the speakers are tightly secured to minimize any vibration or unwanted movement.
By following these steps for mounting the component speakers, you can ensure a proper installation that enhances your car audio experience.
Wiring The Component Speakers
When installing component speakers in your car, it’s essential to wire them correctly for optimal sound quality. One important aspect to consider is speaker wire polarity. This refers to the positive and negative terminals on the speaker and the corresponding connections to the stereo system.
To ensure proper speaker wire polarity, you need to identify the positive and negative terminals on both the speakers and the stereo system. Typically, the positive terminal on the speaker is marked with a “+” sign, while the negative terminal is marked with a “-” sign. However, if your speakers do not have such markings, refer to the manufacturer’s documentation for guidance.
Once you have identified the speaker wire polarity, you need to make the appropriate connections. Connect the positive terminal of the speaker to the positive terminal of the stereo system, and the negative terminal of the speaker to the negative terminal of the stereo system. This ensures that the audio signals are correctly transmitted and reproduced by the component speakers.
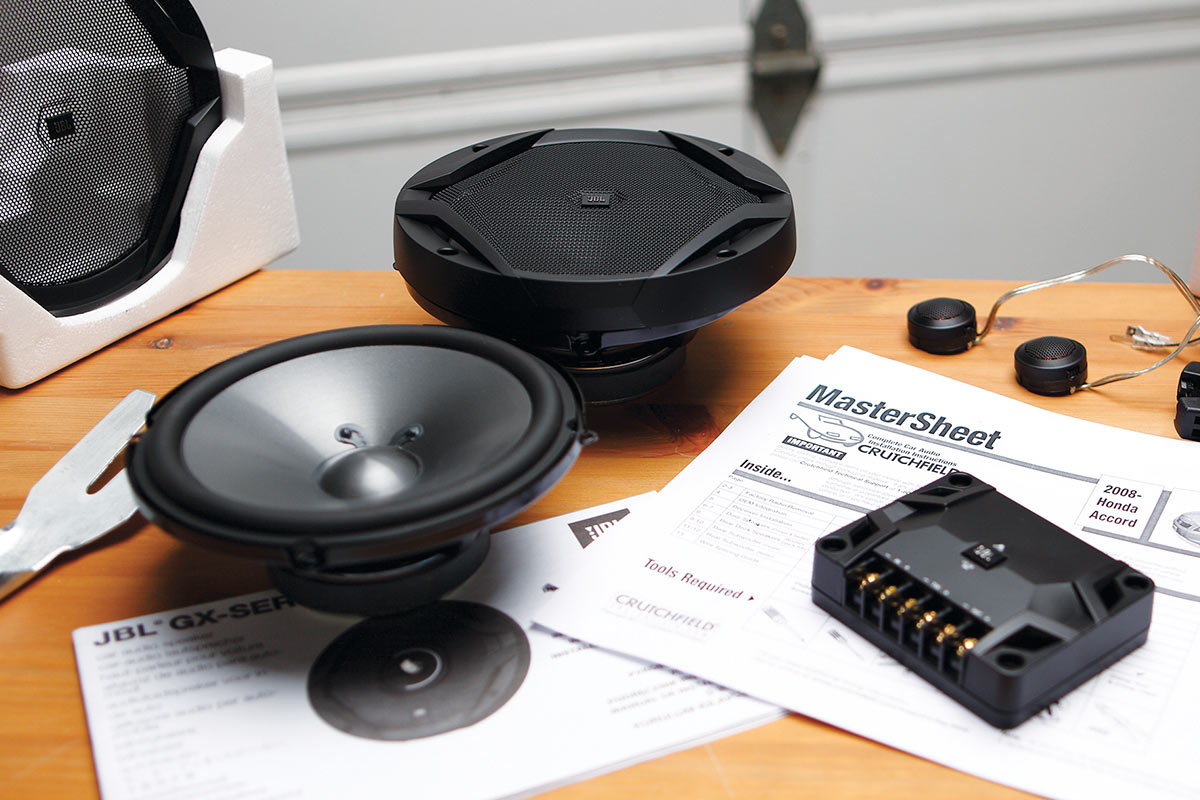
Credit: www.crutchfield.com
Testing And Adjusting
After installing your component speakers, it’s important to test and adjust them to ensure optimal sound quality. Verifying the functionality of each speaker is the first step. Start by playing a test tone through each speaker individually to check if they are producing sound. Make sure to listen for any distortion or irregularities in the audio.
Once you have confirmed that all speakers are functioning properly, you can begin adjusting their settings. This includes adjusting the balance and fader controls to ensure an even distribution of sound between the speakers. It’s also recommended to set the equalizer settings to your preferences, enhancing the frequency response for a more balanced and immersive sound experience.
| Adjustment | Procedure |
|---|---|
| Balance control | Adjust left-to-right speaker balance until desired sound distribution is achieved. |
| Fader control | Adjust front-to-rear speaker balance for optimal audio performance. |
| Equalizer settings | Customize the sound response by fine-tuning the equalizer settings according to your personal preferences. |
Remember to listen to various genres of music during the adjustment process to ensure the speakers deliver excellent performance across different audio types. Taking the time to properly test and adjust your component speakers will result in a superior audio experience that elevates your in-car entertainment.
Reinstalling Door Panels
Once you have successfully installed your component speakers, it is time to reinstall the door panels. This step is essential to ensure that the speakers are properly secured and protected inside your vehicle’s doors. To begin, carefully place the door panels back in position by aligning the panel with the door frame. Make sure all the mounting clips are properly inserted and engaged.
Next, take the time to check for any loose connections before securing the panels. This includes verifying that all electrical connections are secure and properly connected. It is crucial to ensure that all wiring harnesses and speaker connections are plugged in correctly to avoid any issues later on.
Finally, once you have confirmed that all connections are secure, gently press the door panel against the door frame and apply even pressure to secure it in place. Take care not to force the panel to avoid any damage. Double-check that all mounting clips are fully engaged and that the panel is flush against the door.
With the door panels securely back in position, you can now enjoy the enhanced sound quality and performance of your newly installed component speakers.
Troubleshooting Common Issues
| Issue | Possible Causes | Possible Solutions |
|---|---|---|
| Sound Distortion |
|
|
| Compatibility Concerns |
|
|
When troubleshooting component speakers, it is important to identify and resolve common sound distortion issues. Sound distortion can occur due to poor amplification, incorrect wiring, or improper speaker placement. To address these issues, check and adjust amplifier settings, double-check the wiring connections, and reposition the speakers for optimal sound.
Additionally, compatibility concerns can also cause troubles. Incompatible impedance, inadequate power handling, and incorrect size or fit can all lead to problems. To overcome compatibility concerns, ensure speakers and amplifier have matching impedance, upgrade the amplifier or speakers if power handling is insufficient, and verify correct size and fit before installation.
Maintenance Tips For Longevity
Regular cleaning and inspection are essential for ensuring the longevity of your component speakers. Keep your speakers clean and free from dust and debris by using a soft cloth or brush to gently remove any build-up. Make sure to pay extra attention to the components and connections to prevent any damage or interference.
Inspect your speakers regularly to identify any signs of wear or damage, such as frayed wires or loose connections. If you come across any issues, address them promptly to prevent further damage and maintain optimal speaker performance.
Additionally, to preserve the sound quality of your component speakers, avoid exposing them to extreme temperatures and humidity levels as this can affect their performance over time. Store your speakers in a cool, dry place when not in use.
In conclusion, by following these maintenance tips and regular cleaning and inspection guidelines, you can help ensure that your component speakers last for a long time and deliver optimal sound quality.
Fine-tuning Sound Quality
Installing component speakers in your car can greatly enhance the sound quality of your audio system. One important aspect of fine-tuning the sound quality is adjusting the equalizer settings. By customizing the equalizer, you can optimize the audio for your personal preferences. Is the bass too overpowering? Lower the lower frequencies. Do the vocals need a boost? Adjust the midrange. Is the treble too sharp? Decrease the higher frequencies. Experimenting with the equalizer settings will allow you to find the perfect balance for your listening pleasure.
In addition to adjusting the equalizer, there are other sound enhancement options you can explore. Sound deadening materials can minimize road noise and improve overall audio clarity. You can also consider adding a sound processor to further refine the sound quality. These processors can correct audio imperfections and deliver a more immersive listening experience.
So, go ahead and unleash the full potential of your component speakers by fine-tuning the sound quality and exploring additional sound enhancement options. Your ears will thank you!
Frequently Asked Questions On How To Install Component Speakers
How Do I Install Component Speakers In My Car?
To install component speakers in your car, start by disconnecting the battery and removing the door panel. Then, remove the factory speaker and mount the new component speaker. Connect the speaker wires and test the audio. Finally, reassemble the door panel and enjoy your new sound system.
What Tools Do I Need To Install Component Speakers?
To install component speakers, you will need basic tools such as a screwdriver, panel removal tool, wire strippers, and crimpers. Additionally, you may need a drill, tape measure, and socket set depending on your specific car model and installation requirements.
Can I Install Component Speakers In Any Car?
Yes, component speakers can be installed in any car. However, the installation process may vary depending on the make and model of your vehicle. It is recommended to consult the car’s manual or seek professional help for proper installation.
Conclusion
Installing component speakers can greatly enhance the overall audio experience in your car. By following the step-by-step guide shared in this blog post, you can ensure a successful installation. From gathering the necessary tools to correctly connecting the wires, every detail has been covered.
Whether you are a car DIY enthusiast or a beginner, this guide will make the process seamless. Upgrade your car’s sound system and enjoy high-quality music on your drives.


