

To install a Lutron Dimmer Switch, follow these simple steps. Lutron dimmer switches are a popular choice for homeowners looking to enhance their lighting control and create the perfect ambiance in their space.
Whether you are upgrading an existing switch or installing a new one, the process is fairly straightforward. We will guide you through the steps to successfully install a Lutron dimmer switch in your home. With just a few tools and a little bit of time, you can enjoy the benefits of a dimmable lighting solution in no time.
So, let’s get started and learn how to install a Lutron dimmer switch!
Why Install A Lutron Dimmer Switch?
Installing a Lutron dimmer switch offers numerous benefits for both homeowners and businesses. With a Lutron dimmer switch, you can increase energy efficiency and reduce electricity costs. By adjusting the lighting levels, you have the power to create the perfect ambiance for any occasion.
Not only does installing a Lutron dimmer switch provide financial advantages, it also enhances the overall quality of lighting within your space. With the ability to control the intensity of your lights, you can effortlessly set the mood in any room, whether it’s a cozy dinner at home or a vibrant social gathering.
Investing in a Lutron dimmer switch offers a smart solution to elevate your lighting experience while saving energy and lowering your electricity bills. Take advantage of this innovative technology and enhance your space with customizable lighting levels, all at your fingertips.
Essential Tools And Materials
A successful installation of a Lutron Dimmer Switch requires the right tools and materials. Ensure you have the following items on hand before you begin:
| Checklist of necessary tools: | Recommended materials for the installation process: |
|
|
When working with electrical components, safety precautions are crucial. To ensure a safe installation, keep the following in mind:
- Always turn off the power at the circuit breaker before starting.
- Use a voltage tester to confirm that the power is off.
- Follow the manufacturer’s instructions carefully.
- Securely connect wires using wire nuts and electrical tape.
- Double-check all connections before restoring power.
Preparing For The Installation
To install a Lutron dimmer switch, it is important to properly prepare for the installation. Begin by turning off the power supply to the switch. This is crucial for your safety. You can do so by locating the circuit breaker that controls the power to the switch and flipping it to the off position. Next, remove the existing switch cover plate by using a screwdriver to unscrew the screws holding it in place. Set the cover plate aside for now.
Removing The Existing Switch
When installing a Lutron dimmer switch, the first step is to remove the existing switch. This involves disconnecting the wires from the old switch and properly labeling each wire for easy identification. Start by turning off the power to the switch at the circuit breaker. Next, use a screwdriver to remove the screws holding the switch plate in place. Take note of the wire connections before disconnecting them. To prevent confusion, it’s important to label each wire with masking tape or colored markers. Once the wires are labeled, carefully remove them from the old switch. Afterward, remove the screws securing the old switch to the wall and carefully pull it out. With the old switch removed, you are now ready to install the new Lutron dimmer switch.
Installing The Lutron Dimmer Switch
Installing a Lutron dimmer switch is a simple and straightforward process. To begin, it’s essential to understand the different components of the dimmer switch. These include the dimmer switch itself, mounting screws, and wire connectors. Once familiar with the components, start by mounting the dimmer switch onto the wall. Use the provided screws to ensure it is securely in place. Now, it’s time to connect the wires to the appropriate terminals. Ensure the power is turned off before handling any wires. Connect the black wire to the black terminal, the green or bare copper wire to the ground terminal, and the red or blue wire to the remaining wire terminal. It’s important to follow the specific instructions provided by the manufacturer to ensure a safe and efficient installation. With the switch mounted and wires connected, turn on the power and test the dimmer switch to ensure it’s working correctly.
Credit: www.homedepot.com
Testing And Verification
To test and verify the functionality of your Lutron Dimmer Switch after installation, follow these steps: 1. Restoring power and turning on the switch: – Ensure that the power to the switch and the connected light fixture is turned off at the circuit breaker. – Restore power by switching on the circuit breaker for the respective electrical circuit. – Turn on the Lutron Dimmer Switch and check if the connected light fixture powers on. 2. Checking the functionality of the dimmer switch: – Adjust the dimming level using the switch and see if the connected light fixture responds accordingly. – Test different dimming levels to confirm smooth operation and avoiding any flickering or buzzing sounds. 3. Troubleshooting common issues: – If the connected light fixture does not turn on, double-check the power restoration and switch operation. – Ensure that the dimmer switch is compatible with the light fixture’s type (e.g., LED, incandescent). – Consult the instruction manual or contact Lutron support for further assistance. Remember to follow the safety guidelines and consult a qualified electrician if you encounter any technical issues during the installation or testing process.
Tips And Best Practices
IntroductionIf you want to install a Lutron dimmer switch properly and ensure its long lifespan, here are some tips and best practices to follow:
First subheadingMaximizing The Lifespan Of Your Lutron Dimmer Switch
In order to maximize the lifespan of your Lutron dimmer switch, it is important to install it correctly. Follow the manufacturer’s instructions and ensure proper wiring. Make sure to use suitable electrical connections and tools to avoid any damage during the installation process.
Second subheadingProper Cleaning And Maintenance Techniques
To keep your Lutron dimmer switch operating smoothly, regular cleaning is essential. Use a soft, dry cloth to wipe away any dust or dirt that may accumulate over time. Avoid using water or liquid cleaners as they can damage the switch. In addition, avoid pressing the dimmer switch too hard as it can cause internal components to wear out prematurely.
Third subheadingAdditional Features And Customization Options
Lutron dimmer switches offer additional features and customization options to enhance your lighting experience. Take advantage of the built-in timers, presets, and programmable settings to create the perfect ambiance in your space. With Lutron’s advanced technology, you can easily adjust the brightness and control multiple dimmer switches simultaneously.
Explore Lutron Dimmer Switch Options
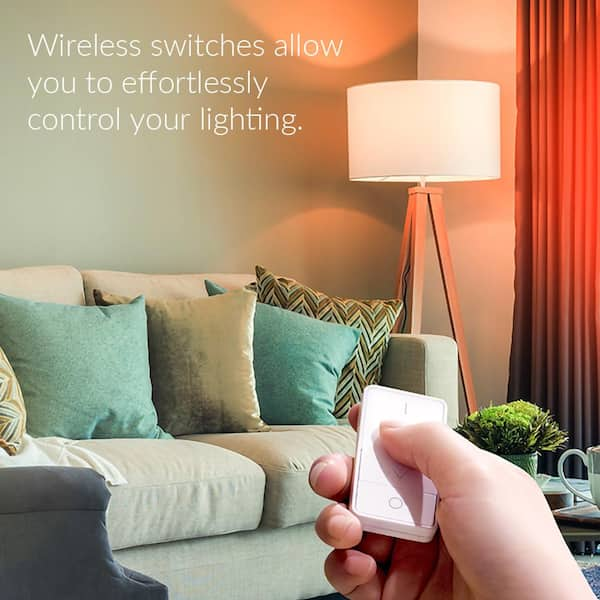
Lutron offers a range of dimmer switch models to suit different needs. Let’s start with an overview of the different Lutron dimmer switch models. The Caseta Wireless Dimmer Switch is a popular choice that allows for wireless control of your lights via a smartphone app. The Maestro Dimmer Switch, on the other hand, features a sleek design and advanced programming capabilities.
When choosing the right dimmer switch for your specific needs, consider factors such as the type of lighting you have and the load capacity required. For example, the Diva Dimmer Switch is designed for use with incandescent and halogen bulbs, while the C.L Dimmer Switch is compatible with a wider range of bulb types, including dimmable LEDs and CFLs.
Exploring compatible bulbs and fixtures is crucial to ensure optimal performance of your Lutron dimmer switch. It’s important to check the compatibility chart provided by Lutron to see if your bulbs and fixtures are compatible with the specific dimmer switch you choose.
Frequently Asked Questions On How To Install Lutron Dimmer Switch
How Do I Install A Lutron Dimmer Switch In My Home?
Installing a Lutron dimmer switch is a simple process. Firstly, turn off the power at the circuit breaker. Next, remove the existing switch and disconnect the wires. Connect the wires to the new Lutron dimmer switch according to the manufacturer’s instructions.
Finally, restore power and test the dimmer switch to ensure it is working properly.
Are Lutron Dimmer Switches Compatible With All Types Of Light Bulbs?
Yes, Lutron dimmer switches are compatible with a wide range of light bulbs, including incandescent, halogen, dimmable LED, and dimmable CFL bulbs. However, it is important to check the packaging or manufacturer’s guidelines to ensure compatibility with specific bulbs. Using incompatible bulbs may cause flickering or buzzing.
Can I Install A Lutron Dimmer Switch Myself Or Should I Hire A Professional?
While it is possible to install a Lutron dimmer switch yourself, it is recommended to hire a professional electrician for complex installations or if you are unfamiliar with electrical work. Safety should always be a priority, and a professional can ensure correct wiring and proper installation, giving you peace of mind.
Conclusion
Installing a Lutron Dimmer Switch is a straightforward process that can significantly enhance your home’s lighting control. By following the clear instructions provided, you can easily replace your existing switch and enjoy the convenience and energy-saving benefits of dimming. Remember to turn off the power, identify the wires, make the proper connections, and test the switch before finishing the installation.
With a Lutron Dimmer Switch, you can create the perfect ambiance in any room, saving energy and enhancing your home lighting experience.


