
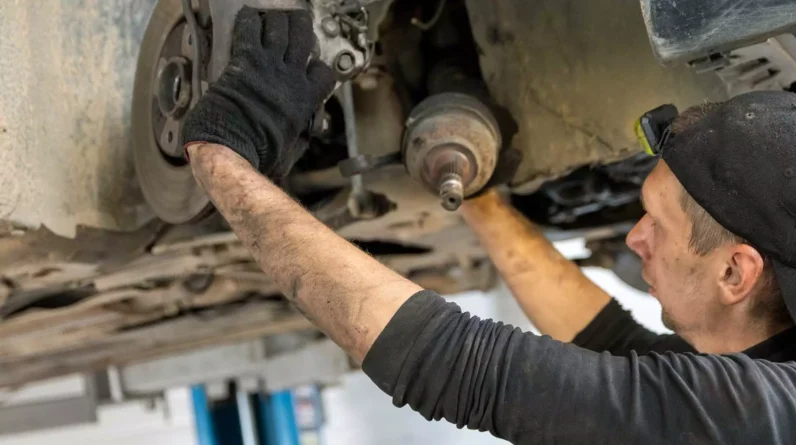
To install a CV boot clamp, first position the clamp around the CV boot and tighten it using a clamp tool or pliers. Here is a simple step-by-step guide on how to install a CV boot clamp.
CV boot clamps are an essential component of a vehicle’s constant velocity (CV) joint, protecting it from dirt and debris. Over time, these clamps may wear out or break, requiring replacement. Installing a new CV boot clamp is a simple process that can be done at home with a few basic tools.
This article provides a step-by-step guide on how to install a CV boot clamp to ensure the proper functioning and longevity of your vehicle’s CV joint. Proper installation of the CV boot clamp will help prevent damage to the CV joint, ultimately saving you time and money in the long run.
Ensuring A Secure And Long-lasting Fit
Choosing the right Cv boot clamp and ensuring a proper installation is crucial for maintaining the integrity of your vehicle’s drive axle. A secure and long-lasting fit provides numerous benefits, including:
- Preventing dirt, debris, and moisture from entering the Cv joint
- Protecting the Cv boot from premature wear and tear
- Extending the lifespan of the Cv joint
- Reducing the risk of joint failure
- Enhancing overall steering and handling performance
A poorly installed Cv boot clamp, on the other hand, can have serious consequences. It may lead to:
- Leakage of grease from the Cv joint
- Contamination of the joint with dirt and water
- Accelerated wear and tear on the Cv boot
- Loss of lubrication resulting in joint failure
- Costly repairs or replacement of the entire drive axle
Therefore, to maintain optimal vehicle performance and avoid expensive repairs, it is essential to pay attention to the proper installation of the Cv boot clamp.
Gather The Necessary Tools And Materials
To successfully install a CV boot clamp, you will need to gather the following tools:
| Tools | Materials |
|---|---|
| Screwdriver | CV boot clamp |
| Pliers | CV boot |
| Socket wrench | Grease |
| Torque wrench | Safety gloves |
| Hammer | |
| Wire cutters |
Make sure you have all the necessary tools and materials before starting the installation process. This will ensure a smoother and more efficient process. With these tools in hand, you’ll be ready to tackle the task of installing a CV boot clamp.
Prepare The Cv Joint And Boot
To properly install a CV boot clamp, it is important to first prepare the CV joint and boot. Start by inspecting the CV joint for any signs of damage or wear. Look for cracks, tears, or excessive wear that could compromise the performance of the joint. If any issues are found, the CV joint should be replaced before proceeding with the installation.
Once the CV joint is confirmed to be in good condition, the next step is to ensure that it is properly cleaned. Cleanliness is essential for a secure and effective installation. Use a degreaser or a specialized CV joint cleaner to remove any grease, grime, or dirt buildup. Make sure both the CV joint and boot are thoroughly cleaned and free from any contaminants.
With the CV joint inspected and cleaned, it is now ready for the installation of the CV boot clamp. Proper preparation of the CV joint and boot ensures a smooth and successful installation, ultimately extending the life and performance of the CV joint assembly.
Positioning The Cv Boot
Correctly position the Cv boot over the Cv joint
Positioning the Cv boot correctly is crucial to ensure a secure fit over the Cv joint. Start by aligning the boot with the joint, making sure it is centered and properly seated. This will prevent any misalignment or shifting during installation.
Once aligned, firmly press down on the boot to ensure it is securely attached to the joint. Check for any gaps or unevenness in the positioning, as these may indicate an improper fit.
Ensuring the boot is properly aligned will prevent any future issues such as leaks or damage to the Cv joint. It is important to take the time to position the boot correctly, as a secure fit is essential for the overall performance and lifespan of your Cv joint.
Installing The Cv Boot Clamp
In order to install a Cv boot clamp securely, it is important to follow a few simple steps. First and foremost, it is crucial to choose the appropriate size and type of Cv boot clamp. This can be determined by measuring the diameter of the Cv boot and selecting a clamp that matches it. Once the correct clamp has been obtained, the installation process can begin.
Start by lubricating the Cv boot with silicone grease to ensure smooth installation. Then, position the Cv boot over the joint and slide the clamp onto the boot, making sure it is centered. Use a clamp tool or pliers to tighten the clamp securely.
Next, check the tension of the clamp to ensure it is tight enough to hold the boot in place, but not so tight that it damages the boot. The Cv boot should be securely fastened and able to move freely during operation.
It is important to note that proper installation of the Cv boot clamp is essential for maintaining the integrity of the Cv joint and preventing any potential damage or leakage. By following these step-by-step instructions, you can confidently install a Cv boot clamp and ensure the longevity of your vehicle’s Cv joint.
Avoid Common Installation Mistakes
When installing a CV boot clamp, it is essential to avoid common mistakes that can lead to damage to the CV joint or boot. These mistakes can often be easily identified and avoided with a few simple tips.
Firstly, make sure to inspect the CV joint and boot before installation. Look for any signs of damage, such as cracks or tears, as these can lead to further issues down the line. Additionally, ensure that the boot is properly lubricated to prevent excess friction and wear.
During installation, take care to position the clamp correctly. It should be placed securely around the boot to ensure a tight fit and prevent any leaks. Also, be cautious not to overtighten the clamp, as this can cause undue stress on the joint.
Lastly, after installation, inspect the clamp and boot to ensure everything is secure and in place. Check for any signs of movement or looseness, as this may indicate an incorrect installation.
| Tips for Preventing Damage |
|---|
| Inspect the CV joint and boot before installation. |
| Ensure proper lubrication of the boot. |
| Position the clamp securely around the boot. |
| Avoid overtightening the clamp. |
| Inspect the clamp and boot after installation. |
Regular Maintenance And Inspection
Regular maintenance of the Cv boot and clamp is crucial for ensuring the long-term functionality of your vehicle. By taking proper care of this component, you can avoid costly repairs and potential breakdowns. One important aspect of maintenance is inspecting the Cv boot clamp for wear and tear.
An undamaged Cv boot clamp is essential for the protection of the Cv boot, which is responsible for keeping the lubrication intact and preventing dirt and debris from entering. Conducting regular inspections can help identify any signs of damage, including cracks, splits, or loose clamps.
If you notice any issues with the Cv boot clamp, it is important to take immediate action. Replacing a worn or damaged clamp can be done relatively easily by following a few simple steps. However, if left unattended, a faulty clamp can lead to further damage, significantly impacting the performance of your vehicle.
Additional Measures For Extra Security
Tips for reinforcing the Cv boot and clamp for added durability
To ensure a secure and long-lasting fit, there are some extra steps you can take when installing a Cv boot clamp. These measures will provide additional security and help prevent any potential issues in the future.
- Apply a layer of lubricant to the Cv boot before attaching the clamp. This will help reduce friction and protect the boot from wear and tear.
- Double-check the tightness of the clamp. Use a torque wrench to ensure that the clamp is properly tightened, following the manufacturer’s specifications.
- Inspect the Cv boot regularly after installation. Look for any signs of damage or wear, such as cracks or tears. If any issues are found, it is important to replace the boot and clamp as soon as possible.
- Consider using a high-quality, heavy-duty Cv boot clamp for added strength and durability. These clamps are designed to withstand more stress and provide a secure fit.
By taking these extra measures, you can reinforce the Cv boot and clamp, providing added security and peace of mind. This will help ensure that your Cv joint remains protected and in optimal condition for a longer period of time.
Credit: www.homedepot.com
Frequently Asked Questions Of How To Install Cv Boot Clamp
How Do You Install A Cv Boot Clamp?
To install a CV boot clamp, first, slide the clamp onto the CV boot. Then, position the boot onto the CV joint, ensuring proper alignment. Use pliers to crimp the clamp ends together tightly, securing the boot in place. Finally, check for any leaks or looseness to ensure a proper installation.
Can You Replace A Cv Boot Clamp Yourself?
Yes, you can replace a CV boot clamp yourself. By following the proper steps and using the right tools, you can remove the old clamp and install a new one. Just make sure to inspect the CV boot thoroughly for any damage before replacing the clamp.
Are There Different Types Of Cv Boot Clamps?
Yes, there are different types of CV boot clamps available. The most common types are ear-type clamps, band clamps, and wire clamps. Each type has its own installation process and may require specific tools. It’s important to choose the right type of clamp for your specific CV boot and follow the manufacturer’s instructions.
Conclusion
To successfully install a CV boot clamp, follow these step-by-step instructions. By understanding the importance of maintaining the integrity of your CV joint, you can ensure long-lasting performance and safety for your vehicle. Remember to choose the correct size and type of clamp, use proper tools, and apply even pressure when tightening.
With this knowledge and a bit of practice, you’ll be able to confidently tackle CV boot clamp installations like a pro. Happy wrenching!


