
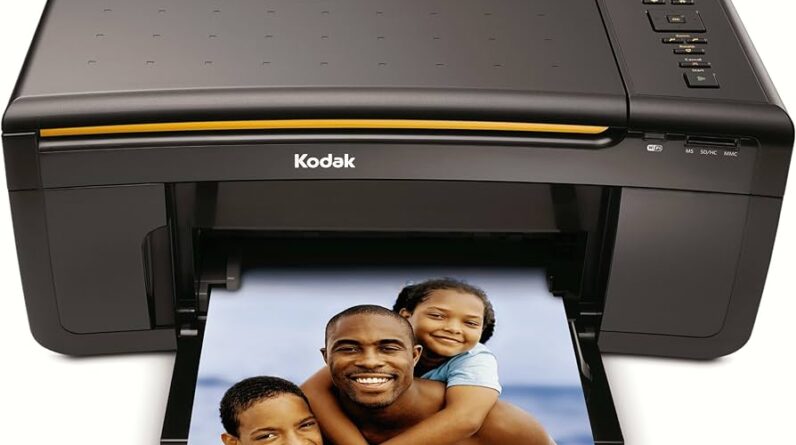
To install the Kodak Verite 55 Printer, follow these steps: download the printer driver from Kodak’s official website, run the driver installer file, connect the printer to your computer using a USB cable, and follow the on-screen instructions to complete the installation process. Introduction (120 words): Installing a printer can be a straightforward process if you have the right guidance.
One such printer is the Kodak Verite 55 Printer, which offers high-quality prints and ease of use. We will guide you through the step-by-step process of installing the Kodak Verite 55 Printer on your computer. By following these instructions, you will be able to set up your printer quickly and efficiently.
Whether you are a beginner or an experienced user, this guide will help you navigate through the installation process seamlessly. So, let’s dive in and get your Kodak Verite 55 Printer up and running in no time.
Preparing For Installation
Before you begin with the installation process of your Kodak Verite 55 Printer, it is important to ensure that you have all the necessary materials and that your equipment is compatible. Firstly, check the compatibility of your computer or device with the printer. Make sure it meets the system requirements specified by Kodak. Next, gather all the necessary materials such as the printer, power cord, USB cable, and ink cartridges.
Once you have everything ready, you can proceed with connecting the printer to a power source. Locate a suitable power outlet and plug in the power cord. Ensure that the power source is working properly. Once connected, switch on the printer using the power button. If the printer has a display, it should light up. Now your Kodak Verite 55 Printer is ready to be installed.
Remember to consult the printer’s user manual for detailed instructions on the installation process specific to your device.
Installing Ink Cartridges
To install the ink cartridges on your Kodak Verite 55 printer, follow these steps:
| Step 1: | Identifying Ink Cartridge Slots |
| Step 2: | Removing Protective Seals |
| Step 3: | Inserting Ink Cartridges Properly |
Start by identifying the ink cartridge slots on your printer. These slots are usually labeled or color-coded to indicate which cartridges go where. Take note of the positions to avoid confusion.
Next, remove the protective seals from the ink cartridges. These seals are typically located on the bottom or top of the cartridges. Carefully peel off the seals without touching the ink nozzles to prevent any damage or leakage.
Finally, insert the ink cartridges properly into their respective slots. Ensure that each cartridge is securely positioned and pushed all the way in until it clicks into place. This will guarantee proper installation and functionality.
Connecting Printer To Computer
| USB Connection: | Connecting Printer to Computer via USB Cable | Installing Printer Drivers |
|---|---|---|
| Wireless Connection: | Connecting Printer to Wi-Fi Network | Installing Printer Drivers |

Credit: www.amazon.com
Configuring Printer Settings
To configure the settings for your Kodak Verite 55 Printer, you need to access the Printer Settings Menu. This menu allows you to adjust various aspects of the printer’s performance to ensure optimal results. One important setting to consider is the Paper Size and Type. This setting allows you to select the appropriate paper size and type for your print job, ensuring the printer performs at its best. Another setting to pay attention to is Print Quality. By adjusting the print quality, you can enhance the sharpness and clarity of your prints. Additionally, the Duplex Printing setting enables you to print on both sides of the paper, reducing paper usage. Lastly, the Scanner Settings let you configure the desired settings for scanning documents or photos. By exploring these printer settings, you can customize your Kodak Verite 55 Printer to meet your specific needs.
Testing The Printer
After successfully installing the Kodak Verite 55 Printer, it is important to test its functionality before proceeding with any printing tasks. The first step is to print a test page to ensure that the printer is functioning properly. This can be done by navigating to the printer settings on your computer and selecting the option to print a test page.
Once the test page is printed, it is essential to check the print quality. Look for any blurriness, smudges, or faded text. If the print quality is not satisfactory, refer to the printer’s user manual for troubleshooting steps or contact the manufacturer for assistance.
Additionally, it is recommended to perform a printer function test. This involves testing different functions of the printer such as scanning and copying. Verify that each function is working as expected and producing accurate results.
By thoroughly testing the Kodak Verite 55 Printer, you can ensure that it is properly installed and functioning before starting any printing tasks. This will help you avoid any inconvenience or issues down the line.
Troubleshooting Common Installation Issues
If you are facing issues while installing your Kodak Verite 55 Printer, there are a few common problems that you might encounter:
| Problem | Possible Solutions |
|---|---|
| Printer Not Recognized by Computer | 1. Ensure that the USB cable is properly connected to both the printer and the computer. 2. Restart both the printer and the computer. 3. Update the printer driver from the manufacturer’s website. |
| Printer Offline Status | 1. Check the printer’s connection to the network. 2. Restart the printer and the computer. 3. Set the printer as the default printer in your computer’s settings. |
| Ink Cartridge Error | 1. Make sure that the ink cartridges are properly installed. 2. Remove and reinsert the ink cartridges. 3. Replace any empty or malfunctioning ink cartridges. |
| Paper Jam | 1. Turn off the printer and unplug it from the power source. 2. Gently remove the jammed paper from the printer. 3. Check for any remaining paper scraps and clean the printer’s rollers. |
By following these troubleshooting steps, you should be able to resolve common installation issues with your Kodak Verite 55 Printer.
Frequently Asked Questions On How To Install Kodak Verite 55 Printer
How Do I Install Kodak Verite 55 Printer?
To install the Kodak Verite 55 Printer, start by unpacking the printer and removing all packaging materials. Connect the power cable and turn on the printer, then install the ink cartridges. Next, download and install the printer software from the Kodak website.
Follow the on-screen instructions to complete the installation process.
Can I Install Kodak Verite 55 Printer Without A Cd?
Yes, you can install the Kodak Verite 55 Printer without a CD. Simply visit the Kodak website and download the necessary printer software. Follow the provided instructions to install the printer and complete the setup process. This allows for a more convenient and up-to-date installation process.
How Do I Connect My Kodak Verite 55 Printer To Wi-fi?
To connect your Kodak Verite 55 Printer to Wi-Fi, you need to access the printer’s control panel. From there, go to the network settings and select your Wi-Fi network. Enter the password if prompted, and the printer will establish a connection to your Wi-Fi network.
This will allow you to print wirelessly from any device connected to the same network.
How Do I Replace Ink Cartridges On The Kodak Verite 55 Printer?
To replace ink cartridges on the Kodak Verite 55 Printer, start by opening the printer cover. Wait for the ink carriage to move to the replacement position. Remove the old ink cartridges by gently pushing down and pulling them out.
Take the new cartridges out of their packaging and insert them into the appropriate slots. Close the printer cover and follow the on-screen instructions to complete the ink replacement process.
Conclusion
Installing the Kodak Verite 55 Printer is a simple and straightforward process. By following the step-by-step instructions provided in this blog post, you can have your printer up and running in no time. Remember to carefully connect the necessary cables, install the printer driver, and ensure compatibility with your operating system.
With the Kodak Verite 55 Printer, you can enjoy high-quality printing and convenient functionality. Start experiencing hassle-free printing today!


