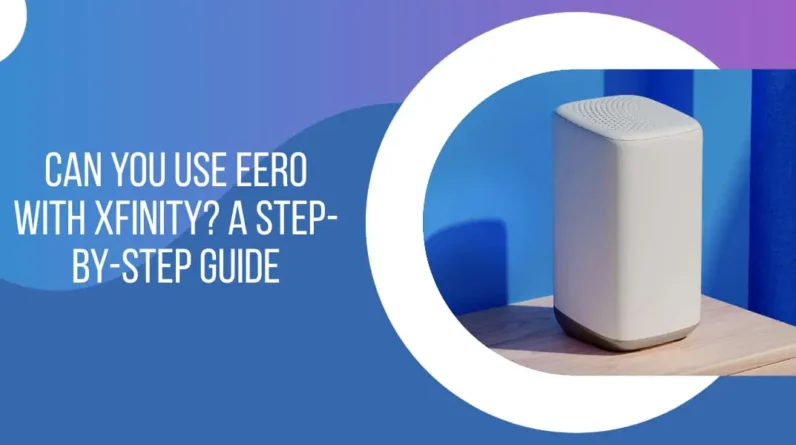
To install Eero 6+, simply connect the main Eero router to your modem and follow the prompts on the Eero app. Now, let’s dive into the details of how to set up the Eero 6+ for seamless internet connectivity throughout your home.
The Eero 6+ is a popular mesh Wi-Fi system designed to provide strong and reliable internet coverage in every room of your house. Setting up the Eero 6+ is a straightforward process that can be completed in a few simple steps.
In this guide, we will walk you through the installation process for the Eero 6+ and ensure you have a smooth and hassle-free setup experience. By the end, you’ll be able to enjoy fast and reliable Wi-Fi connectivity in all corners of your home. So, let’s get started with the installation process.
Credit: www.brainwavzaudio.com
Benefits Of Upgrading To Eero 6+
Upgrading to Eero 6+ offers a multitude of benefits that can greatly enhance your internet experience. One of the key advantages is faster internet speeds, allowing you to browse, stream, and download content seamlessly. With Eero 6+, you can say goodbye to frustrating lag times and enjoy a smooth online experience.
Another notable benefit is the improved coverage and connectivity. Eero 6+ utilizes advanced technology to extend the reach of your Wi-Fi signal, eliminating dead zones in your home or office. Whether you’re in the basement or the backyard, you can stay connected without interruptions.
Enhanced security features are also a compelling reason to upgrade to Eero 6+. With built-in protection against malware and phishing attempts, you can browse the internet with peace of mind. Eero’s robust security measures ensure that your personal information and devices are safeguarded from threats.
Preparing For The Installation Process
Before you install your Eero 6+, there are a few things you need to do to prepare. The first step is to assess your current network setup. This involves analyzing your existing equipment and noting down any specific settings or configurations that you have in place.
The next step is gathering the necessary equipment. Make sure you have all the components that come with the Eero 6+ package, including the router, power adapter, and Ethernet cables.
Additionally, it is recommended to create a backup of your current network settings. This will come in handy in case you encounter any issues during the installation process. Take note of any customized settings, such as Wi-Fi network names and passwords, as well as port forwarding or firewall configurations.
By following these steps, you can ensure a smooth installation of your Eero 6+ and minimize any potential disruptions to your network.
What’s Included In The Box
The Eero 6+ installation process is made easy with everything you need included in the box. Let’s take a closer look at what’s inside:
| Items | Description |
|---|---|
| Eero 6+ router | The heart of your Eero mesh network, this powerful router provides fast and reliable Wi-Fi coverage throughout your home. |
| Eero 6+ extenders | These extenders work together with the main router to expand the coverage and eliminate Wi-Fi dead zones in larger homes. |
| Power adapters | Includes the necessary power adapters to connect and power up both the Eero 6+ router and extenders. |
| Ethernet cables | A couple of Ethernet cables are provided to help you connect your devices directly to the Eero 6+ router or extender if needed. |
With these components included in the box, you have everything required to get started with the Eero 6+ installation. Follow the simple instructions provided, and you’ll be enjoying seamless and fast Wi-Fi coverage in no time.
Understanding The Eero 6+ Hardware
Eero 6+ is a powerful and advanced router and extender system that offers seamless Wi-Fi coverage throughout your home. To ensure a successful installation process, it’s important to familiarize yourself with the various ports and buttons on the Eero 6+ devices. This will help you connect and configure them correctly.
| Device | Ports | Buttons |
|---|---|---|
| Router | Ethernet WAN port, 2 Ethernet LAN ports, USB-C power port | Reset button |
| Extender | 2 Ethernet ports, USB-C power port | Reset button |
The LED indicators on the Eero 6+ devices provide important information about the status of your network. Understanding what these lights signify can help troubleshoot any issues that may arise. The router and extenders have different LED indicators that indicate power status, network connectivity, and device activity.
Establishing A Physical Connection
To install your Eero 6+ router, start by establishing a physical connection between your modem and the router. If you already have a router connected to your modem, disconnect it before proceeding. Once your existing router is disconnected, you can start connecting your Eero 6+ router to your modem using an Ethernet cable.
To do this, locate the Ethernet port on the back of your modem and plug one end of the Ethernet cable into the port. Then, connect the other end of the cable into the Ethernet port on the back of the Eero 6+ router. Ensure that the cable is securely inserted into both ports.
Once the physical connection is established, you can proceed with the software setup and configuration. This will involve downloading the Eero app on your smartphone or tablet, creating an Eero account, and following the on-screen instructions to complete the setup process.
By following these steps, you’ll be able to install your Eero 6+ router and enjoy a reliable and secure Wi-Fi connection.
Powering On Eero 6+
Once you have your Eero 6+ router and extenders, it’s time to power them on and ensure a stable power supply and optimal placement. Start by plugging in the Eero 6+ router into a power outlet using the provided power cable. Make sure to choose a location that is centrally located in your home for the best coverage.
Next, plug in the Eero 6+ extenders into power outlets in areas where you need to extend your Wi-Fi signal. These areas could include rooms that are farther away from the router or spaces with weak Wi-Fi signals. By strategically placing the extenders, you can enhance the coverage and eliminate dead zones.
When plugging in the router and extenders, ensure that you have access to a stable power supply. Avoid using power strips or surge protectors that are overloaded or prone to power fluctuations, as these can affect the performance of your Eero 6+ system.
Once everything is plugged in, wait for the Eero 6+ devices to power on and initialize. This process might take a few moments. Once powered on, you can proceed with the setup process as outlined in the Eero 6+ installation guide.
Installing The Eero App
Once you have purchased your Eero 6+ and are ready to set it up, the first step is to install the Eero app on your smartphone or tablet. The app is available for download from the App Store for iOS devices or the Google Play Store for Android devices. Simply search for “Eero” and select the Eero app from the search results to start the installation process.
After downloading the app, you will need to sign in to your existing Eero account or create a new one if you don’t already have an account. Signing in allows you to access all the features and settings of your Eero 6+ and ensure that your network is secure and personalized to your needs.
Adding Your Eero 6+ Network To The App
To install your Eero 6+ network, start by scanning the QR code on your Eero 6+ router using the provided Eero app. This will prompt you to follow the on-screen instructions for setting up your network. The app will guide you through each step, making the process simple and straightforward.
Once you scan the QR code, you’ll be prompted to enter a network name and password. It’s important to choose a secure password to protect your network from unauthorized access. After entering this information, the app will take care of the rest and configure your network for you.
Customizing Your Wi-fi Network
To customise your Wi-Fi network after installing Eero 6+, it is essential to choose a unique network name (SSID) and password. This ensures the security and uniqueness of your network. When selecting a network name, it is recommended to use a name that is not easily identifiable or associated with you. Furthermore, a strong password consisting of a combination of letters, numbers, and special characters should be chosen to prevent unauthorized access.
Eero 6+ also allows you to enable advanced features such as a guest network and device prioritization. The guest network feature enables you to create a separate network for visitors, keeping your main network private and secure. Device prioritization allows you to allocate more bandwidth to specific devices, ensuring a smooth and uninterrupted online experience for devices that require a higher connection speed.
By customising your Wi-Fi network and enabling these advanced features, you can enhance both the security and performance of your Eero 6+ system.
Managing Parental Controls And Security Settings
To manage parental controls and security settings on your Eero 6+ system, you can easily set up content filters and time limits for specific devices or users. By doing this, you can ensure a safe and secure online environment for your family.
To set content filters, you can specify what types of content you want to block on certain devices or for certain users. This way, you can prevent access to inappropriate websites or content that may not be suitable for children.
Time limits are another useful feature that allows you to control how much time each device or user can spend online. By setting specific time restrictions, you can manage screen time and promote a healthy balance between online activities and other engagements.
In addition to these settings, you can also enable the built-in security features of the Eero 6+. The eero Secure and Secure+ services provide additional layers of protection against malware, phishing attempts, and other online threats, giving you peace of mind while browsing the internet.
With the Eero 6+, managing parental controls and security settings is a simple and effective way to ensure a safer online experience for your family.
Determining Optimal Extender Placement
Installing an Eero 6+ Wi-Fi extender involves determining the optimal placement for maximum coverage. To begin, it is crucial to identify areas in your home with weak or unstable Wi-Fi signals. This can be accomplished by considering physical obstructions and the layout of your space.
Start by analyzing areas where signal strength is consistently poor or where the connection frequently drops. Check for physical barriers such as walls, floors, or large appliances that might interfere with the signal. Keep in mind that distance from the main router also affects signal strength, so identify areas that are farther away and experiencing weaker Wi-Fi.
Once you have identified these weak signal areas, strategize the placement of your Eero 6+ extender. It should be situated in a central location that maximizes coverage to all parts of your home. Avoid placing the extender in areas with potential signal interference from appliances or large metallic objects.
Connecting And Positioning Eero 6+ Extenders
When installing the Eero 6+ system, it is crucial to connect and position the extenders properly. Pairing each extender with the main Eero 6+ router is a key step in setting up the system. This ensures that the extenders can communicate effectively with the router and provide seamless coverage throughout your home.
Once paired, strategically placing the extenders is equally important. By strategically positioning the extenders, you can maximize the coverage and eliminate any dead zones in your home. In larger homes or areas with multiple floors, it is recommended to place the extenders on different levels to ensure consistent coverage in every area.
Consider the layout of your house and the areas where you need the most coverage. It is recommended to place the extenders near the center of the areas you want to cover. Avoid placing them near objects that may interfere with the signal, such as thick walls or appliances.
Verifying Connectivity And Performance
After successfully setting up your new Eero 6+ network, it is essential to ensure that you have a seamless connectivity experience. To do this, you need to connect your devices and verify their performance.
Connecting your devices to the new Eero 6+ network
Start by connecting your devices, such as smartphones, laptops, and tablets, to the new Eero 6+ network. Locate the Wi-Fi settings on your device, find the Eero network name, and enter the password provided during the setup process. Once connected, you should experience improved network performance and coverage throughout your home.
To ensure optimal performance, it’s recommended to run speed tests on different devices. This will help you identify any network performance issues that may need attention. There are several online speed test tools available that can measure your download and upload speeds. Additionally, you can check the signal strength of your Eero 6+ network using the Eero app. It provides insights into signal quality and coverage, allowing you to make any necessary adjustments to enhance your network experience.
Troubleshooting Common Issues
To ensure a smooth setup process for your Eero 6+ installation, it is essential to be aware of potential connectivity issues that may arise. If you encounter any problems, here are some troubleshooting steps you can take:
1. Ensure Proper Placement: Placement of the Eero devices can significantly impact their performance. Make sure they are centrally located and not obstructed by walls or other objects that may interfere with the signal.
2. Check Internet Connection: Verify that your internet connection is working correctly. If the issue persists, restart your modem or contact your internet service provider for further assistance.
3. Confirm Device Compatibility: Ensure that your devices are compatible with the Eero 6+ system. Check the Eero website for a list of compatible devices.
4. Restart Eero System: Try restarting your Eero system by unplugging the devices, waiting for a few seconds, and then plugging them back in. This can often resolve connectivity issues.
5. Contact Eero Support: If you have followed these troubleshooting steps and are still experiencing issues, reach out to Eero support for further assistance. They have a dedicated team of experts who can help resolve any problems you may encounter.
By following these steps, you can troubleshoot common connectivity issues and successfully set up your Eero 6+ system.
Frequently Asked Questions On How To Install Eero 6+
What Are The Key Features Of Eero 6+?
The Eero 6+ comes with built-in Zigbee smart home hub, tri-band Wi-Fi 6, backward compatibility, and advanced security features, providing faster internet speeds, seamless connectivity, and enhanced protection for your smart home devices.
How Do I Install Eero 6+?
To install the Eero 6+, simply connect the main Eero device to your modem using the provided Ethernet cable, download the Eero app, and follow the step-by-step instructions to set up your network. The app will guide you through the process, making installation quick and easy.
Can I Expand My Eero 6+ Network?
Yes, you can expand your Eero 6+ network by adding additional Eero devices to extend the coverage throughout your home. These devices work seamlessly together, creating a mesh network that ensures a strong and reliable Wi-Fi signal in every corner of your house.
Does Eero 6+ Support Smart Home Devices?
Absolutely! Eero 6+ has a built-in Zigbee smart home hub, which allows you to easily connect and control compatible smart home devices. Whether it’s smart lights, thermostats, or door locks, you can manage them all through the Eero app, making your home smarter and more convenient.
Conclusion
To sum up, installing the Eero 6+ is a straightforward process that doesn’t require technical expertise. By following the simple steps outlined in this guide, you can enhance your home network’s performance and enjoy faster, more reliable internet connectivity. Say goodbye to dead zones and buffering, and say hello to seamless streaming and smooth browsing.
Upgrade your network with the Eero 6+ and experience the difference it can make in your internet experience.

