
To install a line output converter, you need to connect it to the existing speaker wiring and the receiver’s preamp output. This allows you to add an amplifier to your car’s audio system and improve the sound quality and power.
When upgrading your car’s audio system, a line output converter is an essential component. It enables you to connect an amplifier to your factory stereo, giving you greater control and better sound quality. Installing a line output converter may seem daunting, but with the right tools and instructions, it can be done easily.
We will guide you through the step-by-step process of installing a line output converter in your vehicle. By the end, you’ll be able to enjoy a more powerful and detailed audio experience in your car.
Benefits Of Line Output Converters
Line Output Converters (LOCs) are essential devices when it comes to integrating aftermarket sound equipment into your vehicle’s audio system. By allowing for seamless integration, LOCs enable you to upgrade your car’s sound system without the need for major modifications. One of the key benefits of using LOCs is that they enhance audio quality by providing a clean signal transmission. This ensures that the sound produced is clear and free from any interference or distortion. Moreover, LOCs enable you to connect aftermarket amplifiers or subwoofers to head units that do not have preamp outputs. This flexibility allows you to customize your audio setup according to your preferences. With the use of LOCs, you can enjoy high-quality sound and personalize your car’s audio system without any hassle.

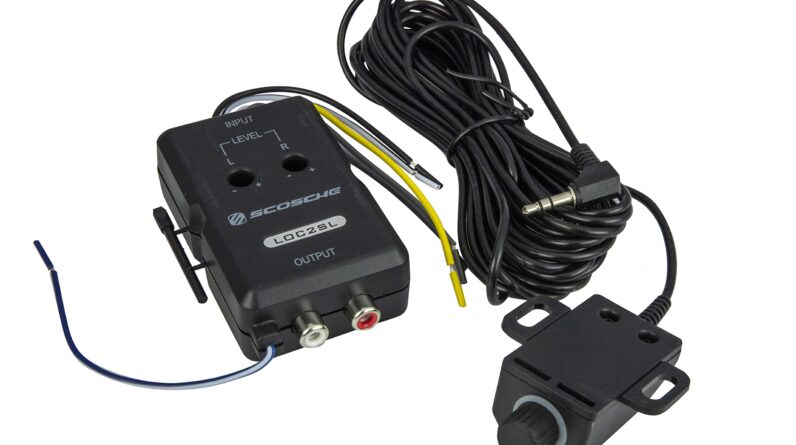
Credit: www.amazon.com
Key Components Of A Line Output Converter
Line output converters are essential components when it comes to installing aftermarket audio systems in your car. They allow you to connect your new audio equipment to your existing factory head unit without the need for complex wiring modifications. One of the key components of a line output converter is the input and output connectors. These connectors act as the interface between your factory head unit and the line output converter, allowing the audio signal to pass through.
Another important feature of a line output converter is the voltage gain control. This allows you to adjust the level of the audio signal coming out of the converter, ensuring optimal sound quality and preventing any distortion.
Furthermore, line output converters provide speaker level input and output options. This means you can connect them to your factory speakers and amplifier, allowing you to maintain the functionality of your existing audio system while enhancing it with aftermarket equipment.
Lastly, it’s crucial to properly connect the ground wire of the line output converter. This ensures a stable and noise-free signal transmission, eliminating any unwanted background noise or interference.
Determine The Appropriate Location For Installation
When installing a line output converter, it is crucial to choose the right location for optimal performance. One key consideration is accessibility and proximity to the head unit. Ensure that the converter is easily reachable for future adjustments or troubleshooting. Additionally, it is essential to maintain proper ventilation to prevent overheating. This can be achieved by selecting a location with sufficient airflow and avoiding areas that may obstruct heat dissipation. By securing an ideal spot, you can guarantee an efficient and effective installation process for your line output converter.
Prepare The Necessary Tools And Equipment
To install a line output converter, you will need a few tools and equipment. These include wire crimpers and strippers, electrical tape or heat shrink tubing, wire connectors, a screwdriver set, and a multimeter (optional).
Gather Essential Information For The Installation
Gathering essential information is crucial for a successful installation of a line output converter. Start by identifying the head unit manufacturer and model. This information will help ensure compatibility and accurate instructions. Referring to the vehicle’s wiring diagram is essential to make the correct connections. It provides the necessary insight into the wiring setup of the vehicle and helps prevent any errors. Additionally, determining the required voltage gain is essential for optimal sound quality. This information will help fine-tune the audio output and deliver the desired results. By following these steps and gathering the necessary information, you can confidently proceed with the installation of a line output converter.
Disconnect The Vehicle’s Battery
Prevent electrical damage and short circuits: Before starting the installation process, it is crucial to disconnect the vehicle’s battery. This step is essential in order to prevent any potential electrical damage or short circuits that could occur during the installation. By disconnecting the battery, you are ensuring the safety of both yourself and your vehicle.
Ensure personal safety during the installation process: When installing a line output converter, it is important to prioritize your personal safety. Use protective gloves and safety goggles to protect yourself from any potential harm. Additionally, make sure to carefully follow the manufacturer’s instructions and consult any relevant manuals or guides. By taking these precautions, you can ensure a safe and successful installation process.
Locate And Access The Head Unit Connection Points
Locate and Access the Head Unit Connection Points
To install a line output converter, you need to first remove the head unit trim panel or bezel. This panel covers the head unit and may be secured by screws or clips. Carefully pry it off using a trim removal tool or a flathead screwdriver, being careful not to scratch or damage the surrounding areas.
Next, you will need to identify the factory wiring harness or speaker wires. These are the wires that carry the audio signals from the head unit to the speakers. You can use a multimeter or a wire harness adapter to determine which wires are the speaker wires. The manual for the line output converter will provide guidance on how to identify the correct wires.
| Factory Wiring Harness | Speaker Wires |
|---|---|
| Wire Color | Location |
| White | Front Left Speaker |
| Gray | Front Right Speaker |
| Green | Rear Left Speaker |
| Purple | Rear Right Speaker |
Once you have located the correct wires, you can splice them with the corresponding wires from the line output converter. Ensure that each wire is securely connected and insulated to prevent any electrical issues. Finally, reassemble the trim panel or bezel onto the head unit, and you’re done.
Connect The Line Output Converter
- Tap into the head unit’s speaker wires: Begin by locating the head unit in your vehicle. Identify the speaker wires that correspond to the channels you want to connect the line output converter to. Using a wire stripper, carefully remove a small section of insulation from each speaker wire.
- Use wire crimpers to make secure connections: Take the positive and negative wires from each channel and connect them to the corresponding wires on the line output converter. Use wire crimpers to securely attach the wires together, ensuring a solid connection.
- Connect the output wires of the line output converter: Locate the output wires on the line output converter. These are the wires that will connect to the amplifier or audio device. Use wire crimpers again to connect these wires to the appropriate input on the amplifier or audio device.
Adjust The Voltage Gain Control
Set the gain level based on the desired audio output:
When installing a line output converter, it is crucial to adjust the voltage gain control to ensure optimal sound quality. To set the gain level, begin by testing the sound system without any adjustments. This will serve as your baseline for comparison.
Next, gradually increase the gain level until you achieve the desired audio output. It’s important to do this incrementally to prevent distortion or clipping. Keep in mind that the correct gain level largely depends on your preferences and the specific audio system you are working with.
Once you have set the gain level to your liking, test the sound system again. Make sure to listen for any potential issues and make further adjustments if necessary. Remember, finding the perfect gain level may take some trial and error, but with patience and attention to detail, you can ensure an optimal audio experience.
Secure And Conceal The Line Output Converter
When installing a line output converter, it is important to securely fasten and hide the converter to ensure a neat and professional installation. One way to achieve this is by using zip ties or mounting screws to secure the converter in place. This will prevent any movement or vibrations that could potentially affect the audio output.
In addition to securing the converter, it is also essential to bundle and organize the wiring. Wrapping the cables neatly and using zip ties or wire loom will help prevent any tangling or interference with other components. Keeping the wiring organized not only improves the overall aesthetic but also makes troubleshooting and future upgrades much easier.
By taking the time to properly secure and conceal the line output converter, you can ensure a reliable and long-lasting audio system in your vehicle.
Reconnect The Vehicle’s Battery
To install a Line Output Converter (LOC) properly, you need to ensure that the vehicle’s battery is reconnected correctly. This step is crucial to avoid any electrical issues during the installation process. Additionally, make sure that all connections are properly installed to ensure a seamless installation. When all the connections are in place, test the sound system for functionality. By doing so, you can verify that the LOC is working correctly and that the audio output is clear and balanced. Once you have confirmed the functionality, you can proceed to enjoy the enhanced audio experience in your vehicle.
Inspecting And Testing Connections
To ensure a successful installation of a line output converter, it is important to thoroughly inspect and test all connections. A common issue that may arise is loose or disconnected wires. Check for any wires that may have come loose during the installation process and especially pay attention to the connection points. Using a multimeter, verify continuity between the different wires, ensuring that the signal is properly transmitted. This step is crucial to ensure that the line output converter is connected correctly and that the audio signal is being transferred effectively. Taking the time to inspect and test connections will help eliminate any potential issues and ensure the best performance of your line output converter. Overall, by carefully conducting these checks, you can confidently proceed with installing your line output converter and enjoy high-quality audio in your car.
Adjusting Voltage Gain Levels
Adjusting the voltage gain levels is an essential step in installing a line output converter to ensure optimal sound performance in your car audio system. By manipulating the gain, you can increase or decrease the power sent to your amplifier, resulting in a better balance of high and low frequencies. Fine-tuning the settings is crucial as it allows you to customize the audio output according to your personal preferences.
Addressing Grounding Issues
Proper grounding of a line output converter is crucial to ensure optimal performance. Before installing the converter, it is essential to verify that the grounding is done correctly. This can be done by ensuring a solid connection to the vehicle’s chassis.
In order to achieve a proper ground connection, it is recommended to find a suitable grounding point near the converter itself. This can be a bolt or screw on the chassis that provides a good metal-to-metal connection. Remove any paint or rust around the grounding point to ensure a clean and secure connection.
Once the grounding point is identified, attach the converter’s ground wire securely to it. Use a wrench or screwdriver to tighten the connection properly. It is important to avoid loose connections, as they can lead to interference and poor audio quality.
By following these steps and ensuring a proper ground connection, you can address grounding issues and ensure that the line output converter operates efficiently, providing you with the best audio experience in your vehicle.
Checking For Interference
To install a line output converter and ensure minimal interference, follow these steps: First, locate the factory speaker wires and connect them to the converter. Next, connect the converter to the amplifier. Finally, test the audio system to ensure a clear and interference-free sound output.
The importance of checking for interference while installing a line output converter (LOC) cannot be understated. Interference can negatively impact the performance and quality of your audio system. To identify potential sources of interference, pay close attention to the alternator and engine of your vehicle. These components can produce electrical interference that may affect your audio output. To mitigate this interference, consider using noise filters or suppression devices. These devices can help minimize unwanted noise and ensure a clean and clear audio signal. By taking these precautionary measures, you can optimize your LOC installation and enjoy high-quality audio without any interference.Frequently Asked Questions For How To Install Line Output Converter
How Do I Install A Line Output Converter?
To install a line output converter, first locate the car’s wiring harness. Then, connect the output converter’s wires to the car’s harness, connecting the speaker wires from the converter to the corresponding wires in the vehicle. Finally, connect the RCA cables from the converter to the amplifier, and ensure all connections are secure.
Why Do I Need A Line Output Converter?
A line output converter is needed when you want to add an amplifier to your car stereo system but do not have a dedicated RCA output. It converts the speaker-level signals from your car stereo into line-level signals that can be used by an amplifier, allowing you to enhance your sound system without replacing the stereo unit.
Can I Install A Line Output Converter Myself?
Yes, installing a line output converter can be done by yourself if you have basic knowledge of car audio systems. However, it is recommended to follow the instructions provided by the manufacturer and use proper tools and safety precautions to ensure a successful and safe installation.
What Tools Do I Need To Install A Line Output Converter?
To install a line output converter, you will need a few basic tools such as wire cutters, wire strippers, crimp connectors, electrical tape, and a soldering iron (optional). Additionally, it is recommended to have a multimeter to test the connections and ensure proper functionality.
Conclusion
In a nutshell, installing a line output converter is a simple and effective way to improve your car audio system. By following the step-by-step process outlined in this guide, you can easily connect your amplifier to your factory stereo and enjoy enhanced sound quality.
Remember to choose a high-quality converter and carefully follow the instructions provided by the manufacturer. With a little patience and attention to detail, you can achieve professional-level audio performance in your vehicle. Happy listening!


